Landscape photography is one of the most captivating genres of photography. It allows you to capture the beauty of nature, from expansive mountain ranges to tranquil seascapes and lush forests. Whether you’re shooting for personal enjoyment or building a portfolio, learning how to take breathtaking landscape photographs requires understanding some essential techniques and principles. In this guide, we’ll walk you through the basics of landscape photography, providing tips on gear, composition, and shooting techniques to help you get started.
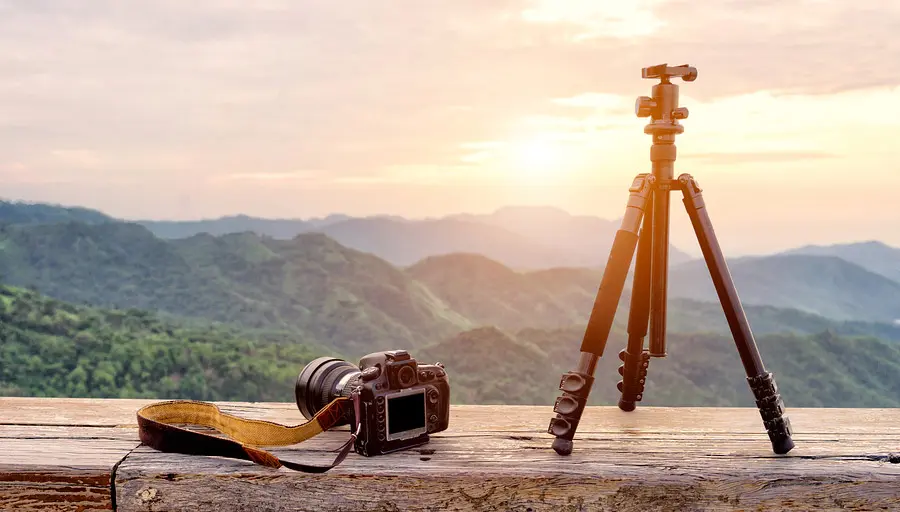
1. Choose the Right Gear
While landscape photography doesn’t always require the most expensive camera equipment, having the right gear will make a significant difference. Here are some essential tools for beginners:
- Camera: A DSLR or mirrorless camera with manual settings will give you full control over exposure, aperture, and shutter speed. Cameras with full-frame sensors are ideal, but crop sensors also work well for landscapes.
- Lens: A wide-angle lens (between 14mm and 35mm) is commonly used in landscape photography. This type of lens allows you to capture vast scenes and get a lot of depth in your shots. If you’re interested in capturing more details from afar, a telephoto lens (70mm or longer) may also be useful.
- Tripod: A sturdy tripod is essential for shooting sharp images, especially in low-light conditions or when using longer exposure times. It helps eliminate camera shake and provides stability.
- Filters: Neutral density (ND) filters and graduated ND filters can help manage exposure in bright conditions, allowing for smoother skies or more balanced light between the sky and foreground.
2. Understanding Composition
Composition plays a huge role in the effectiveness of your landscape photos. Here are some key compositional techniques to consider:
- Rule of Thirds: Divide your frame into three equal sections, both horizontally and vertically. Place the focal points of your image along these lines or at the intersections for a more dynamic composition.
- Leading Lines: Use natural lines such as rivers, roads, or fences to lead the viewer’s eye toward the focal point of the image, like a mountain or tree.
- Framing: Look for natural elements such as trees, archways, or rocks that can frame your subject. Framing helps focus attention and adds depth to the photo.
- Foreground Interest: Including a strong element in the foreground (such as a rock, plant, or path) gives your photo more depth and draws the viewer into the scene.
- Simplicity: Sometimes less is more. Avoid clutter in the frame to keep the focus on the main elements of the landscape.

3. Best Lighting Conditions for Landscape Photography
The quality of light can completely change the mood of your landscape photos. As a beginner, it’s important to learn about the “golden hours” and how to work with natural light:
- Golden Hour: The first hour after sunrise and the last hour before sunset are considered the golden hours. The light during this time is soft and warm, casting long shadows and adding depth and texture to your landscape photos.
- Blue Hour: The time just before sunrise and after sunset is known as the blue hour. The sky takes on a cool, blue tone, which can create a serene, dramatic effect in your photos.
- Avoid Harsh Noon Light: Midday light can create harsh shadows and blown-out highlights, which are less flattering for landscapes. If you do shoot at noon, look for shaded areas or use filters to balance the exposure.
4. Mastering Exposure Settings
Correct exposure is essential for capturing well-balanced landscape photographs. Understanding how to control your camera settings will help you avoid underexposed or overexposed images.
- Aperture (f-stop): Use a small aperture (higher f-stop number, like f/8 to f/16) for a deep depth of field, which ensures that both the foreground and background are in focus.
- Shutter Speed: A slower shutter speed (such as 1/30 sec or slower) can help capture movement, such as flowing water or clouds. A tripod is essential when using slow shutter speeds to prevent camera shake.
- ISO: Keep the ISO as low as possible (ISO 100 or 200) to avoid grainy images. In landscape photography, there’s usually no need to increase the ISO unless you’re shooting in low light.
- Focus: Use manual focus when shooting landscapes to ensure that the focus point is exactly where you want it. Focus about one-third of the way into the scene to get a sharp image from the foreground to the background.
5. Use of Filters
Filters can significantly enhance your landscape photography, especially in tricky lighting conditions. The most useful filters for landscape photographers are:
- Polarizing Filter: This filter reduces reflections on water, wet surfaces, and glass while enhancing colors and contrast in the sky. It’s perfect for saturating skies and making clouds pop.
- ND Filters: Neutral density filters help reduce the amount of light entering your lens, allowing you to use slower shutter speeds during the day to capture smooth water or clouds.
- Graduated ND Filters: These are ideal for balancing the exposure between the bright sky and darker land. They have a gradient from dark to clear, helping to control the exposure difference in your frame.
6. Focus on the Weather and Season
Weather plays a big role in landscape photography, and capturing the right moment can make all the difference. Consider the following tips when shooting in different conditions:
- Cloudy Days: Cloudy skies can create a soft, even light, which is great for capturing detailed shots without harsh shadows. Use this to your advantage when photographing forests or mountains.
- Rain and Storms: Dramatic skies with dark clouds or rain can add mood and atmosphere to your photos. Don’t shy away from stormy weather, as it can create stunning, unique images.
- Snow and Ice: Winter landscapes offer a different set of challenges but can produce breathtaking results. Snow creates a uniform, reflective surface, so you’ll need to adjust your exposure to prevent overexposure. Also, pay attention to how the light interacts with ice and snow to capture interesting textures.
7. Post-Processing Your Photos
After you’ve taken your landscape photos, post-processing can elevate the final result. Some common adjustments include:
- Adjusting Exposure: Fine-tune the exposure levels to ensure the highlights and shadows are balanced.
- Enhancing Contrast and Saturation: Increase the contrast slightly to make the colors pop and adjust saturation to bring out natural tones.
- Sharpening: Apply subtle sharpening to bring out the details in the image, particularly in the foreground and areas of interest.
- Noise Reduction: If you’ve had to use a high ISO, make sure to reduce noise in post-processing to keep your image clean.
Conclusion
Landscape photography is a rewarding and creative way to connect with nature while developing your skills as a photographer. By focusing on the right gear, composition, lighting, and post-processing, you’ll be able to capture stunning landscapes that showcase the beauty of the world around you. Remember, practice is key. Get out there, experiment with different techniques, and, most importantly, enjoy the process of creating beautiful images.